


Have you ever held a finished product and wondered how it evolved from a basic concept to a working model? A CNC prototype, a vital part of contemporary production, frequently marks the beginning of that journey. CNC prototyping uses computer-controlled equipment to turn digital ideas into tangible products. Whether you're making parts for consumer electronics, medical equipment, or automotive applications, knowing the procedure helps you cut down on mistakes, save time, and provide better results. So let's break it down in this blog, step by step.

Conceptualization and CAD Design
Every successful CNC prototype begins with a well-defined concept. First, engineers and designers use CAD (Computer-Aided Design) software to produce a 3D model. This model acts as a guide for the machined object. Dimensions, tolerances, material selection, and functional needs should all be taken into account at this point. CAD files in the format.STP or Usually, .IGES are employed to guarantee accuracy when subsequently translating to machine instructions.
CAM Programming and Toolpath Generation
The CAD file is sent to CAM (Computer-Aided Manufacturing) software upon completion. It is a tool that converts the 3D design into G-code, which is machine code that guides the CNC machine on how to move. For the most effective machining process, engineers may pick the appropriate tools, establish cutting speeds, and create tool paths with the use of CAM software. Think of it like establishing a precise cutting GPS path for a robot.
Material Selection and Preparation
The next step is to decide whether to use composite, plastic, or metal for the prototype. Hardness, machinability, and heat resistance are examples of material qualities that need to match your intended purpose. To start the machining process, the selected raw material is cut to the right dimension and firmly placed into the CNC machine bed. Any mistake at this step could result in wasted time and cost.
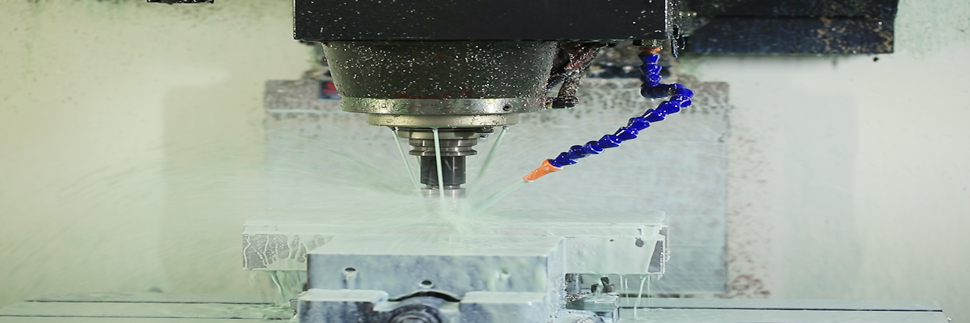
CNC Machining: The Heart of the Process
The material is carved, drilled, and shaped into the prototype by the CNC machine, which might be a mill, lathe, or router, using the G-code that has been entered. Since even a 0.01mm difference might impact the part's performance, precision is crucial at this point. Complex geometries are frequently handled by multi-axis machines, which provide fine details without the need for re-fixturing.
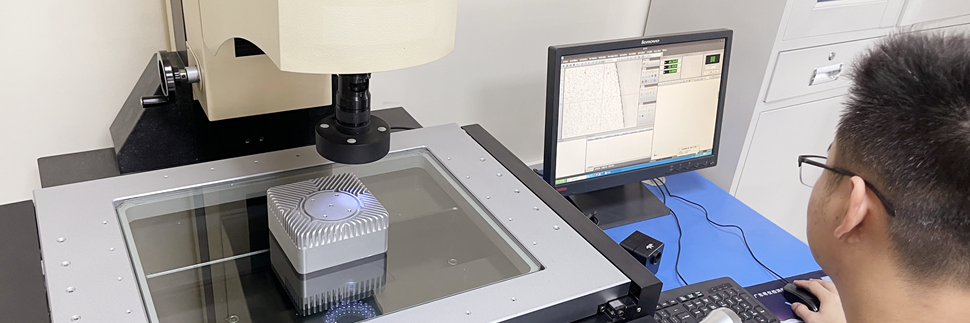
Post-Processing and Quality Checks
The item is not quite ready when machining is finished. In order to improve strength or appearance, post-processing techniques include deburring, polishing, and occasionally heat-treating. To ensure dimensional accuracy, the prototype is subjected to a final quality inspection process using instruments such as CMMs (Coordinate Measuring Machines). Before going into mass production or undergoing more refining, this guarantees the prototype operates precisely as planned.
Final Words
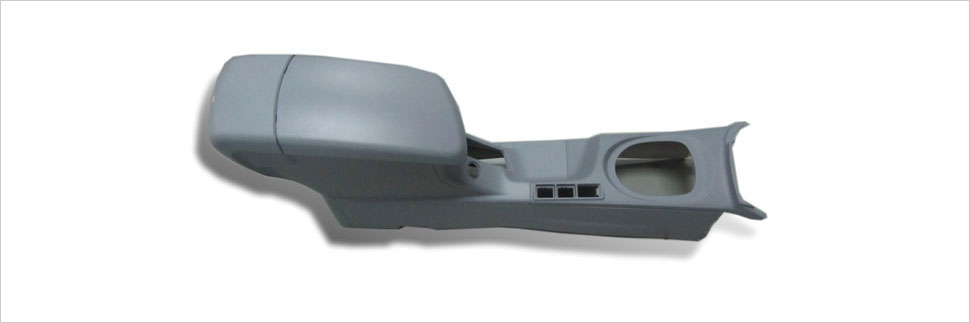
Cutting material is only one step in the process of a CNC prototype; other steps include careful design, engineering accuracy, and ongoing quality assurance. Every stage is essential for the success of your product, no matter how complex the process is or how basic the component is. Additionally, a lot of sophisticated product molds are made using CNC prototyping, particularly in automotive injection mold applications where precision is not negotiable.
FAQs
What kinds of materials are suitable for CNC prototyping?
Depending on the intended function of the finished product, popular materials include POM, stainless steel, aluminum, and ABS plastic.
What is the duration required to finish a CNC prototype?
Depending on the complexity and the availability of the material, it usually takes two to seven days.
Compared to 3D printing, is CNC prototyping more accurate?
Yes, especially for metal components, CNC machining provides better surface polish and dimensional precision.
Can I make changes to a prototype once it has been CNC-machined?
Yes, re-machining or reworking the CAD model for more iterations can be used to make modifications.
Can low-volume production use CNC prototyping?
Yes. For modest to mid-volume manufacturing runs that require accuracy and consistency, CNC is ideal.
How long does CNC prototyping take?
Typically completed within days, thanks to streamlined CAD→CAM→machining workflows .
Ready to accelerate your design? Contact UIDEA for top-quality CNC prototype services—from CAD to delivery—within days.